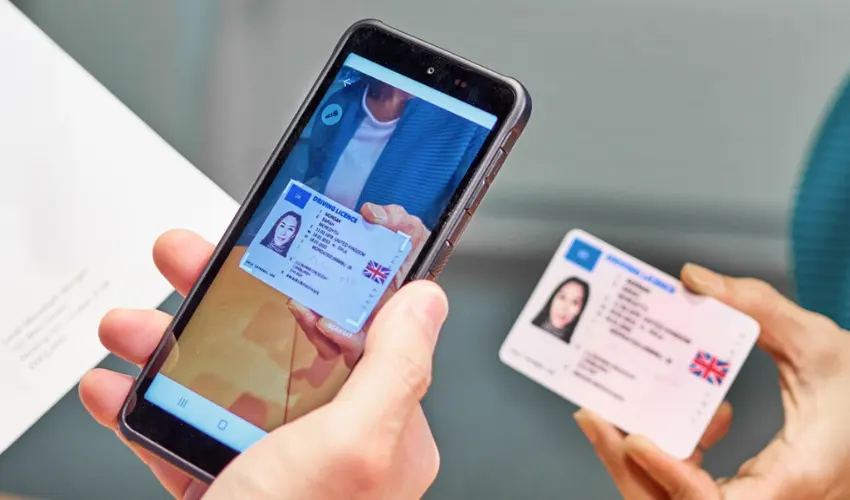
In today’s digital-driven world, scannable IDs have become essential for enhancing security, improving efficiency, and verifying identities in a fast and reliable manner. From schools and workplaces to events and government institutions, scannable IDs help streamline access control, tracking, and verification processes. If you’re looking to design a scannable ID, this comprehensive guide walks you through every step of the process—from planning to production.
Step 1: Understand the Purpose of the ID
Before jumping into design, determine the main objective of the ID card. Is it for employee identification, student access, membership verification, or event entry? The purpose influences the design, data, and scanning technology used. For example, a school ID may require a barcode for library access, while a corporate ID might need an RFID chip for building entry.
Step 2: Choose the Right Scannable Technology
There are several types of scannable technologies used in ID cards. The most common include:
- Barcodes: Cost-effective and widely compatible with scanners. Great for basic identification.
- QR Codes: Can store more information and are scannable using mobile devices.
- Magnetic Stripes: Often used for financial and access control systems.
- RFID/NFC Chips: Offer contactless scanning and are ideal for secure access.
- Smart Chips: Provide encrypted data storage and enhanced security.
Select a scanning technology based on your ID’s functionality, security needs, and infrastructure compatibility.
Step 3: Gather Essential Data and Information
Every ID needs specific personal and organizational data. Typically, an ID includes:
- Full name of the cardholder
- Photograph (headshot) of the individual
- Employee/student/member ID number
- Designation or role
- Department or organization name
- Expiry date (if applicable)
- Scannable code or chip
Make sure the data is accurate, up-to-date, and relevant to avoid future complications.
Step 4: Design the ID Layout
A well-organized, visually clean layout ensures the ID is easy to read and scan. Here are key design tips:
- Use Clear Fonts: Choose legible, professional fonts for all text. Avoid overly stylized typography.
- High-Quality Photo: Use a recent, clear headshot with a neutral background.
- Color Scheme and Branding: Incorporate your organization’s colors and logo for consistency and authenticity.
- Section Hierarchy: Place the most important information (photo, name, ID number) prominently.
- Space for Code/Chip: Leave ample space for the barcode, QR code, or RFID area, ensuring it doesn’t interfere with text or imagery.
Design software such as Adobe Illustrator, Canva, or ID-specific platforms like EasyBadge or ID Flow can help create professional-looking layouts.
Step 5: Integrate the Scannable Element
Depending on your chosen technology, generate and place the scannable component properly. For example:
- Barcodes and QR Codes: Use a barcode generator tool to create unique codes linked to the individual’s data. Place them in a visible yet unobstructed section of the card.
- RFID/NFC Chips: These are embedded into the card during manufacturing. Coordinate with your card supplier to encode the correct data.
- Magnetic Stripes: Store relevant access or personal information on the stripe, usually located on the card’s back.
Always test the scannable features before mass production to ensure functionality.
Step 6: Choose the Right Material
Most Scannable ID are printed on PVC (polyvinyl chloride) or composite plastic cards for durability. For added longevity and security, consider:
- Laminated Finish: Protects the card from wear, moisture, and fading.
- Holograms: Deters counterfeiting by adding a layer of visual security.
- UV Printing: Offers hidden elements visible under UV light for added verification.
Choosing high-quality material not only improves lifespan but also enhances the professional look of the ID.
Step 7: Print and Encode
Once the design is finalized and tested, proceed with printing. Use a high-resolution ID card printer capable of printing both sides if needed. For scannable IDs with embedded tech, ensure proper encoding of data:
- Encode RFID or magnetic stripes with authorized software.
- Test a sample card using a reader or scanner to confirm functionality.
- Batch-print and inspect all cards for consistency and accuracy.
Step 8: Implement a Management System
A card management system (CMS) helps you keep track of issued IDs, update data, and deactivate cards when necessary. Whether you use proprietary software or a custom solution, having centralized control over scannable IDs ensures operational efficiency and security.
Step 9: Train Staff and Users
Ensure that both administrators and users understand how to use and handle the scannable IDs. Provide training on:
- Proper scanning technique
- What to do if the ID is lost or damaged
- Access protocols tied to the ID
Clear instructions reduce misuse and ensure smooth adoption.
Step 10: Review and Update Periodically
Technology and organizational needs change over time. Regularly review your ID design and system to ensure it remains secure and functional. Update expired cards, replace worn-out ones, and upgrade scanning tech when needed.
Conclusion
Designing a scannable ID is more than just printing a photo card—it involves strategic planning, smart technology choices, and a focus on functionality and security. By following these ten steps, you can create professional, durable, and efficient ID cards that serve their purpose reliably across various use cases.
Whether you’re designing IDs for a small team or a large organization, taking the time to get it right will pay off in both usability and credibility.


